Drone Layer etc.

There is so much to say and so little time to say it. (Metaphor for life?)

My learning curve continues to be a steep one. Who knows when it will level out 🙂

Here is a summary:

  • Continued to study over the winter and prepared necessary equipment.
  • Attended an ‘Integrated Pest Management & Adult Bee Diseases’ course.
  • Attended a ‘Swarm Control’ course.
  • Attended a ‘Queen Rearing & Nucleus Creation’ course.
  • I have an SBA Bee Basics Practical Exam in a couple of weeks from now.
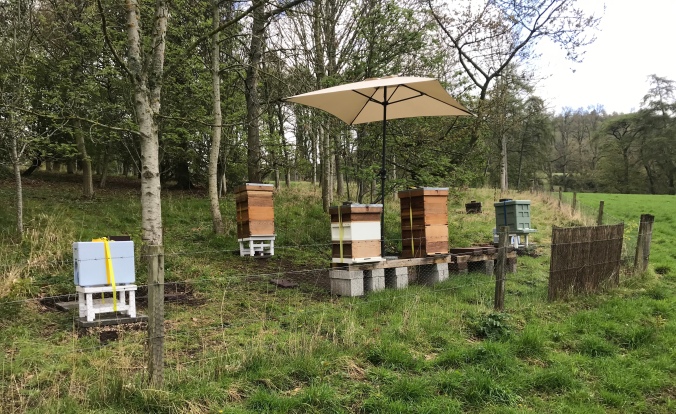
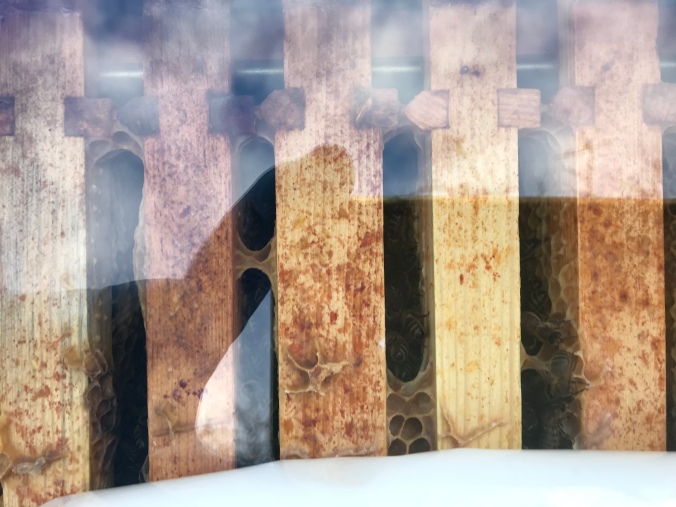
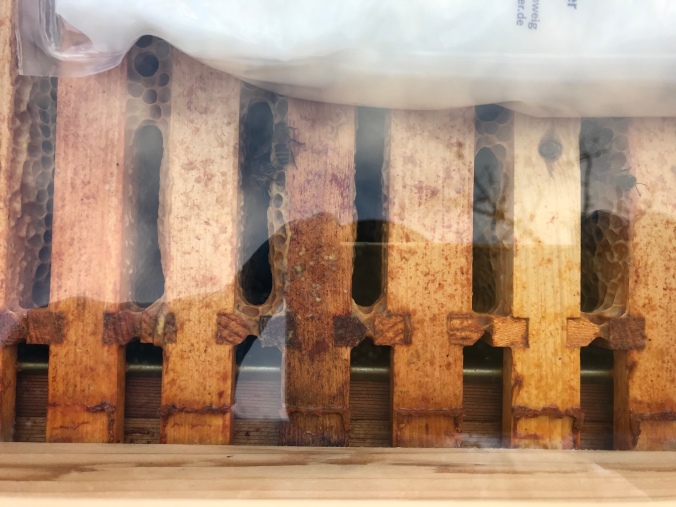
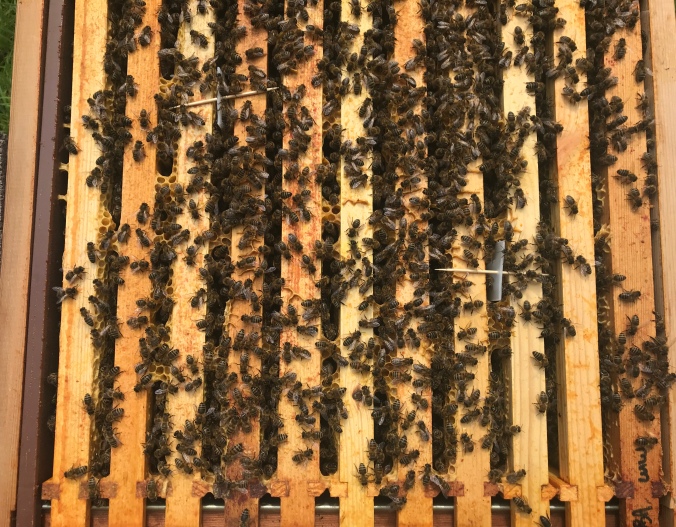
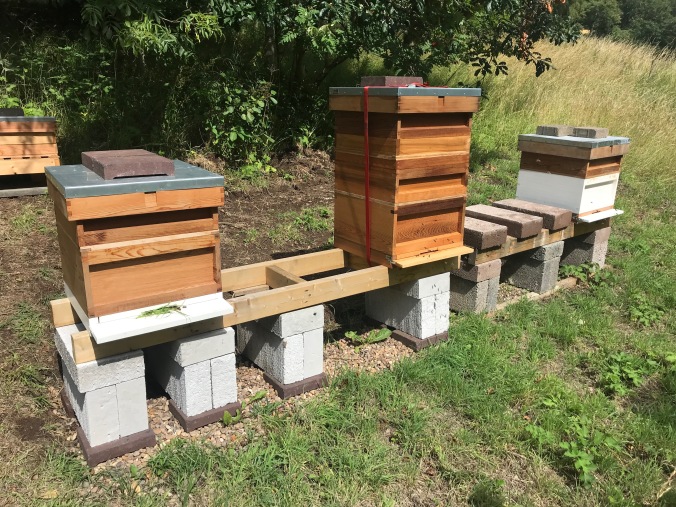
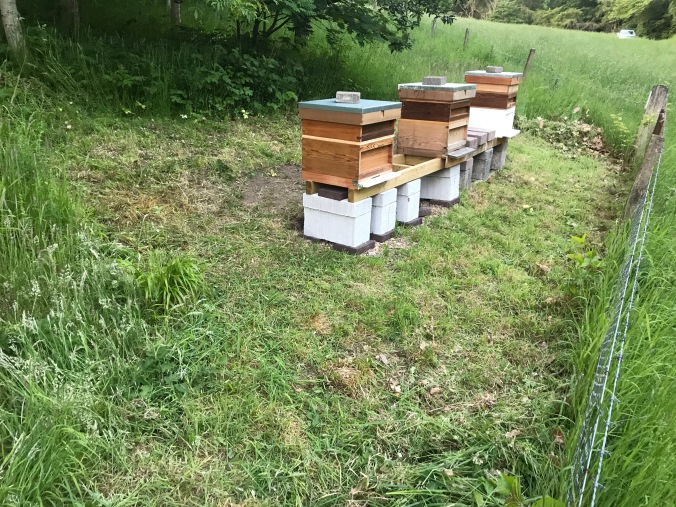
  • My Apiary now consists of 5 colonies (3 wooden hives and 2 poly’ hives) and 1 bait hive.
  • I have 1 NUC (6-frame) in my garden that is in the process of superseding its 2015 queen

IMG_9323

  • I had to carry out ‘swarm control’ three times and on each occasion I chose the ‘nucleus method’.
  • During June, two of the colonies became quite low on stores and required supplementary feeding – particularly because the colonies had a lot of foundation to draw out and a lot of wax creation was needed.
  • A poor start to the season, in respect of the weather, meant that initial inspections were late. Then a short spell of good weather kicked everything off and the potential for swarming, when very few drones were around, was not a recipe for quick production of virgin queens that would go on to mate and then start laying successfully.
  • My First colony was queen-less for 5 weeks and became a drone layer.

fullsizeoutput_3310

  • Thankfully that situation has been resolved. The colony now has a queen and I am hoping she will start laying within the next few days – particular now that there is an expectation of better weather.
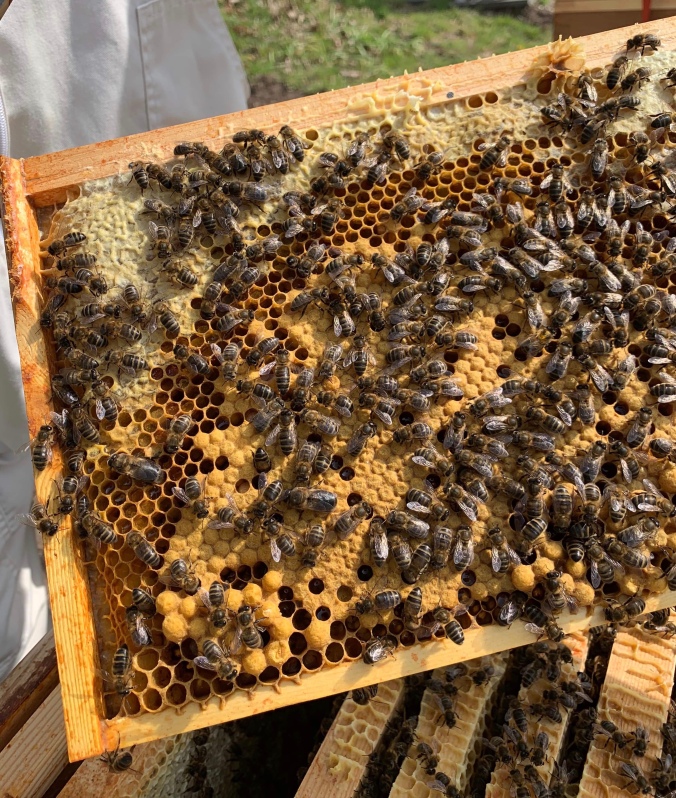
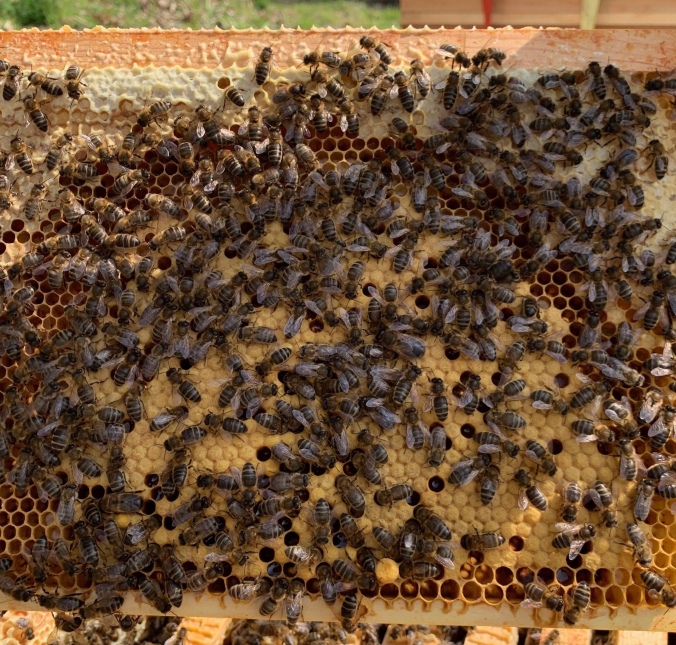
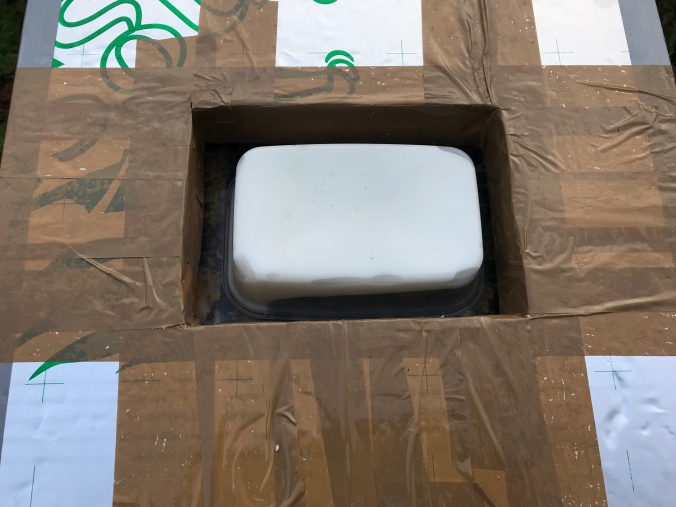
  • I have made good use of ‘Test Frames’ and they “really do what they say on the tin”.
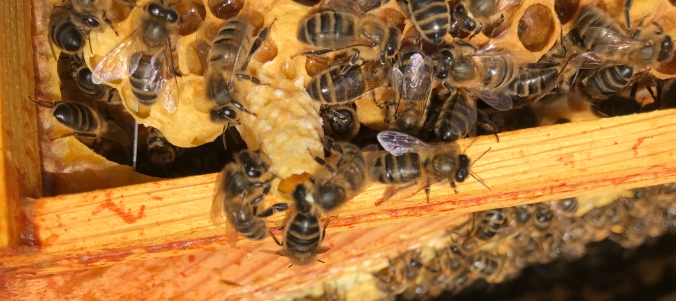
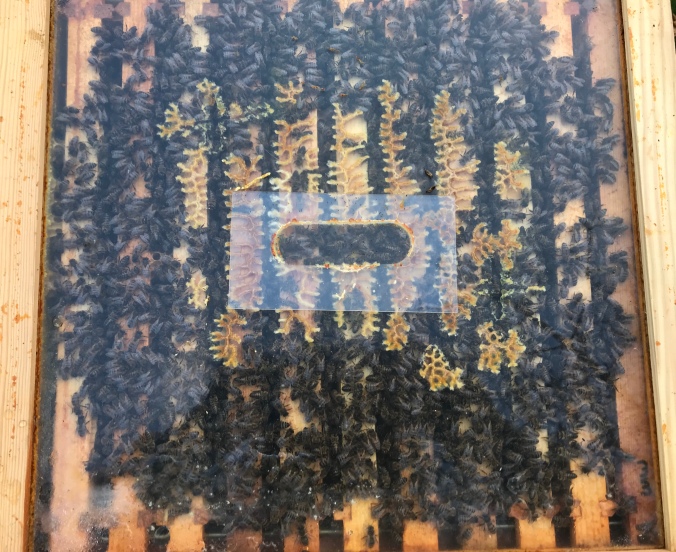
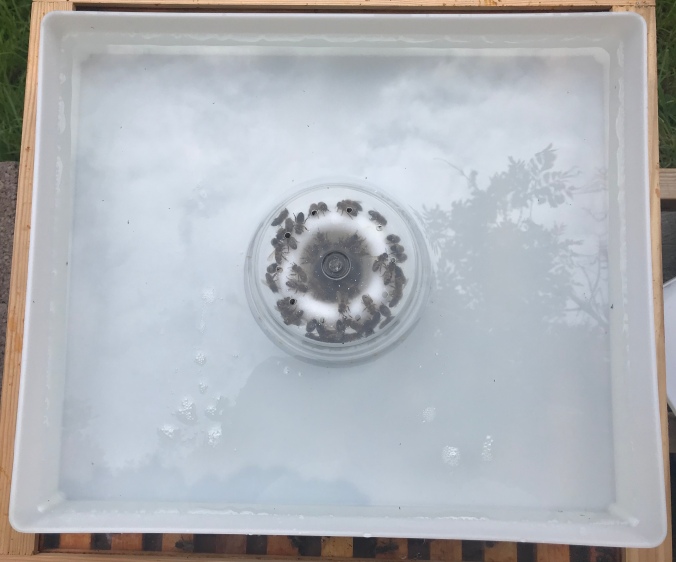
  • As part of ‘Varroa control’ I like using 1 shallow frame in a brood box where the bees draw out their own drone comb. (What makes them choose drone brood below a shallow frame?). Timing seems essential. There is an advantage that the bees are kept busy and either the drones can add to the drone pool or the drone brood can be removed (and with it the varroa mite that is attracted to the drone brood that takes longer to mature than the females. (No sexist comments please 🙂 )

IMG_9581

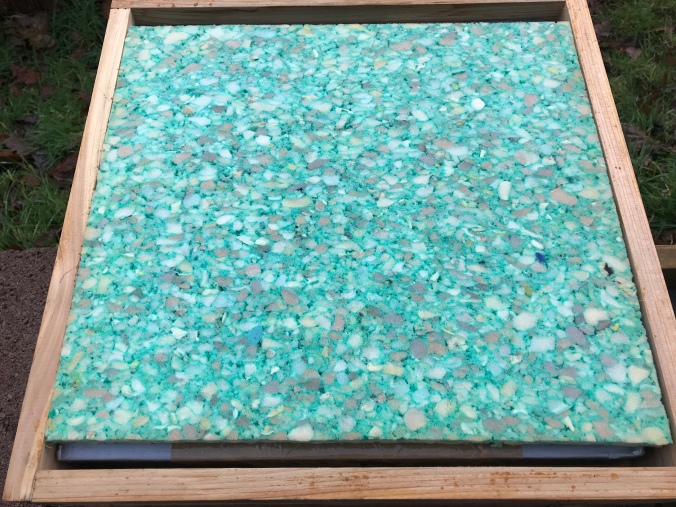
  • I have tried out Poly hives and have concluded that, in addition to the wooden hives, both types of hive offer benefits over each other.
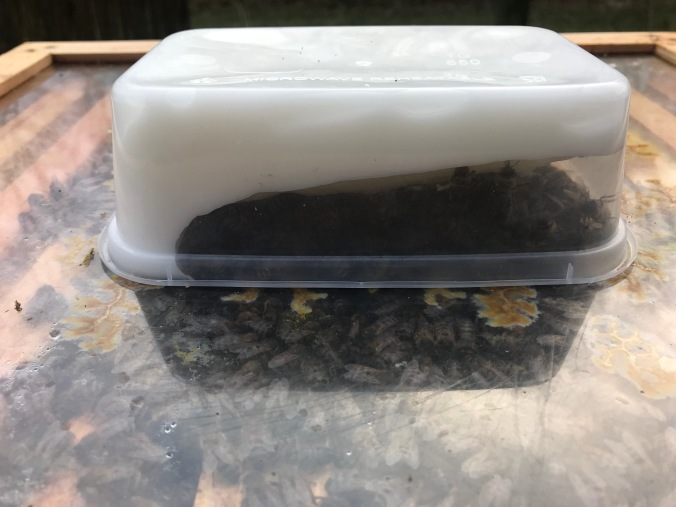
  • I have had 1 unsuccessful attempt at using a mini-mating NUC to produce a queen from 1 queen cell that was removed from a colony that was attempting to swarm.

IMG_9640

  •  I have been called out to assist with capturing swarms

IMG_9478

  • I have given advice to the two members of the public that had bumble bees nesting in empty bird boxes.
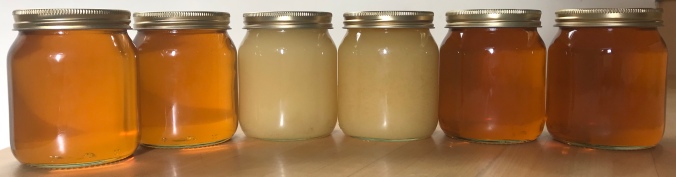
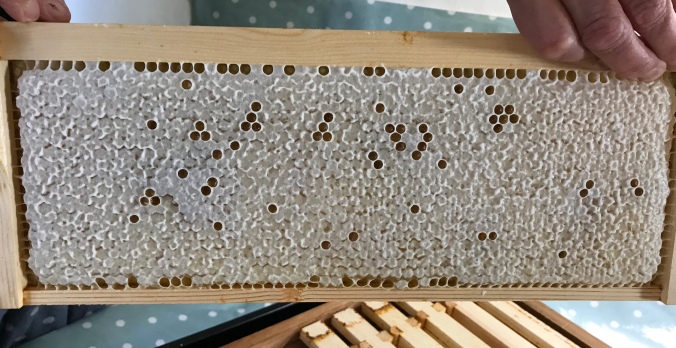
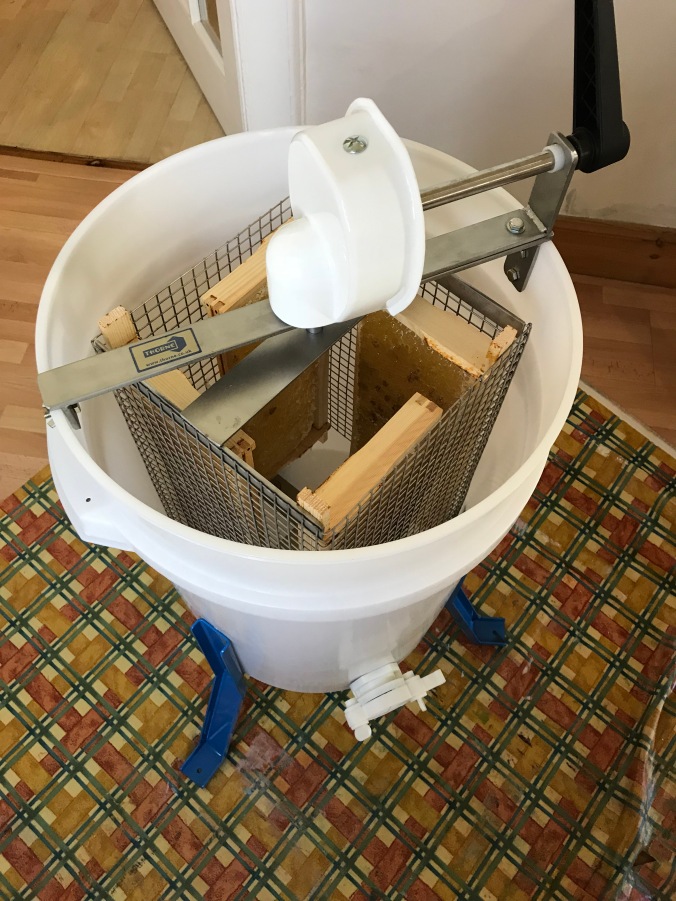
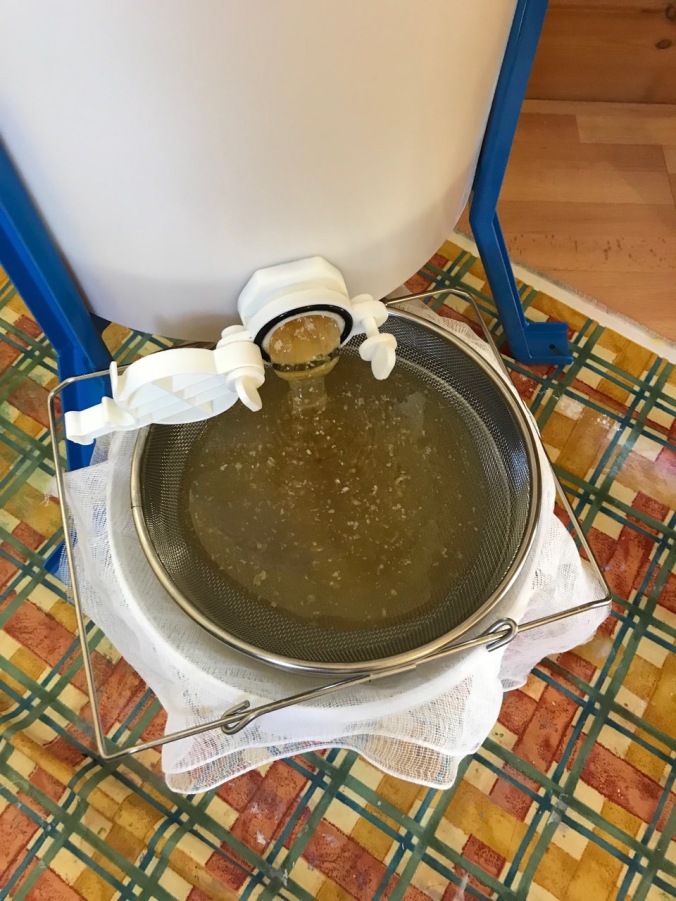
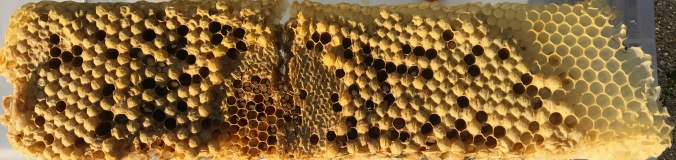
  • And I have extracted 1 full super of honey (only) so far.

So all the fun of the fair. Oh what fun to be had. Here’s hoping that July and August will be good months for beekeeping.

Swarm Control Take 2

fullsizeoutput_3260

A (Swarm) Queen Cell in the making in Colony #2

Eleven days after Colony #1 made preparations to swarm, Colony #2 attempted to do the same. Thankfully, and because inspections are now being carried out every 7 days or less, I was able to prevent them from swarming. The 2018 queen was moved on her frame into another NUC and 4 other frames were added. In this NUC there are 5 frames in total consisting of 2 brood, 2 honey & pollen and 1 laying space.

The NUC from Colony #1 was kept at the apiary. But I found that too many flying bees returned to it’s parent colony because I still haven’t got the knack of applying the sappy grass to the entrance properly. It’s either too tight or too slack. Therefore, after splitting colony #2 instead of using ‘sappy grass’ I used the rotating entrance guard on the NUC. Leaving nothing to chance I have moved this NUC to our garden (over 3 miles away from the apiary). The flying bees will therefore acclimatize themselves to their new home more easily. I fed the bees in NUC #2 today and it already looks stronger than NUC #1. It will be returned to the apiary in about 1 month from now after the parent colony has been checked to see if it has a new 2019 queen and if it is laying worker brood.

It’s tempting to speculate whether or not colony #2 may have been over stimulated with the food I gave it to get the bees through the winter and then when April provided more unusually extreme and fluctuating weather conditions it contributed to their early desire to swarm. A very large colony was housed in a ‘brood and a half’. It already has 3 supers on it. One of these supers will be ready to remove for extraction this coming week. And it’s better to remove that now because it’s likely to be filled with honey from Oil Seed Rape as it’s source. Honey production from colonies 1 and 2 will now suffer in the month of May when both colonies are temporarily queen-less.

So now it will be all eyes on colony #3 to see how it performs. (It will also be interesting to see how these Carniolan bees compare with the Apis Mellifera Mellifera bees). A second super was added to it yesterday. There were no outward signs of swarming and the queen had sufficient space to lay. Steady as she goes please!

Wouldn’t it be so much simpler if the weather played ball? Having to inspect and knock down queen cells in poor weather goes against the grain:

fullsizeoutput_326a

The brolly is to protect the bees from the rain as I work – not to sun myself while having a beer or a G&T. But cheers anyway………………


Happy Beekeeping on Easter Saturday

fullsizeoutput_3250

Finally, after what seems to have been a frustratingly long period with temperatures of around 11°C or less, along comes an Easter weekend that provides glorious weather to allow first full inspections of all my colonies (three). Last year I made my first inspection of the season on 8th April and the colony attempted to swarm 1 month later. It’s a later start for me this year but not for my bees as colony #1 is in the early stages of preparing to swarm.

All colonies survived the winter and all looked strong and healthy. On the above photo sealed worker brood, drone brood, open larvae and honey stores can be seen.

I teamed up with another beekeeping friend this weekend and assisted each other at our respective apiaries. The value in having another pair of eyes cannot be underestimated.

Colony #1

At the end of August last year I reunited the 2015 queen with #1 colony because I was convinced that a new queen had not emerged/mated. How wrong can you be? On my first full inspection for 2019 I found a 2015 queen and a 2018 queen happily occupying the same hive and seemingly both laying worker brood etc.  I understand that this situation is not commonplace but may occur more frequently than we realise. The main thing is that both queens survived. I re-marked the 2015 queen (markings had rubbed off) and I also marked the 2018 queen.

The colony overwintered with a double brood box system – each box containing 10 frames instead of the usual 8 for a double or 11 for a single.

But on this first inspection I saw a few adult drones and some sealed drone brood. More importantly there were 3 unsealed queen swarm cells (QC) and one of them contained an egg that was being fed royal jelly. Swarm control was therefore necessary and I chose to use the ‘nucleus’ method. Both queens were moved out of colony #1, rendering it temporarily queen-less. Each queen was placed into a 3-frame NUC with sappy grass at their entrances. (1 frame of stores, 1 frame of brood and 1 frame of drawn comb in each NUC). 2 frames of house bees were also shaken into the NUC. In the parent colony I knocked down two of the QCs and kept the QC that was in the first throws of developing. I marked the frame to indicate the QC position so I know which one it is when I go back in 7 days time to knock down any other QCs that may have been produced. (I didn’t mark the QC frame when undertaking swarm control last year. That was a beginner’s fundamental mistake). Six frames of foundation were added to the parent colony, replacing the frames that were put in the NUCs. Thus the Queen has been separated from the flying bees and more space has been provided.

I removed the insulation from the top of the hive and finally I changed the orientation of the frames from ‘Cold Way’ to ‘Warm Way’ because it is easier for me to inspect the hives when positioned directly behind the hive.

Colony #2

This colony overwintered as a brood and a half with the super below the brood box. It, too, has plenty of stores and brood in all stages. No queen cells were seen and I have added a super to give the bees more space. I found the 2018 queen and marked it Red.

Again, I removed the insulation and changed the frame orientation from the ‘Cold’ to ‘Warm’ way.

fullsizeoutput_3253

Colony #3

This is a new colony of bees that I bought from an experienced commercial beekeeper. He is downsizing his operation due to teaching commitments. This is a colony of Carniolan bees that has a 2018 queen. The queen was marked red before I bought it. And the colony was housed in an old R. Steel & Brodie National hive. I have transferred the colony into a new ‘Payne’s Polystyrene National hive. (When I have cleaned up the old hive I may use it as a bait hive). Again I changed the frame orientation from the ‘Cold’ to ‘Warm’ way. I also needed to add a super to this colony to give the bees more space. Some of the nearby OSR fields have been slowly coming into flower so a honey flow should be imminent. There was ‘brood in all stages’, a good amount of stores, and no QCs were seen.


Oxalic Acid (Trickle Treatment)

fullsizeoutput_306b

fullsizeoutput_3067

My bees (both colonies) are now ‘clustering’ between the frames. Hopefully they have sufficient stores to see them through the winter but in addition they also have fondant, placed directly on top of the frames, for them to access as and when required.

Today is the 23rd December which is two days after the Winter Solstice. This is the time of year when you would expect a colony of honey bees to be close to, if not, brood-less. It is therefore an ideal time to treat for Varroa Mite by applying oxalic acid. Why? Because the varroa mites will be carried around on adult bees only (i.e. phoretic) and not be in brood cells. It is easier to kill mites when they have not moved into brood cells – where they reproduce. There are two application methods for consideration: ‘trickle’ or ‘sublimation’ although there are pros and cons for both methods. Trickle treatment requires mixing powdered oxalic acid with a 1:1 ratio of sugar syrup and then trickling this mixture onto the seams of bees that are clustered between the frames using a syringe. The guideline recommendations for the mixture must be followed to the letter and similarly the amount of mixture that is applied to each seam of bees. The trickle method requires less kit than the sublimation method and can be applied very quickly. The sublimation method requires a ‘vaporiser’ and a 12v (car) battery and more PPE but it has the advantage that the hive can be treated without opening it up. However, because I have an ‘Out Apiary’ that cannot be accessed by car during the winter I chose to use the trickle method because carrying a flask of oxalic mixture and syringe is easier than taking a heavy car battery with me. The oxalic trickle treatment was carried out today.

IMG_8218

I continue to ‘heft’ my hives every 2 weeks in an effort to try to assess the level of stores remaining for each colony. It is an ‘art’ that, as yet, I have not developed the necessary level of experience for which I can satisfactorily interpret the results (of hefting). But at least I have polycarbonate cover boards in place through which I can quickly see into the top of the hive without disturbing the bees too much.

We are now in the ‘holiday season’ and Christmas is fast approaching. I would like to take this opportunity to thank those that provide me with encouragement and instruction. They include: East of Scotland Beekeeping Association (ESBA), Scottish Beekeepers Association (SBA), Stan Franklin & Gavin Ramsey, Pete Watt’s Facebook group, Ron Bain, Stewart Spinks and The Norfolk Honey Company, Mike’s Beekeeping, Beekeeping365, The Scottish Beekeeper Magazine, and the BeeCraft Magazine and not least Neil and Morag for allowing me the space to indulge this rewarding pastime.

A Merry Christmas to all.


Winter Feeding

fullsizeoutput_301c

A view of my strongest colony (2018 Queen) seen through a National Polycarbonate Quilt on 18th November 2018.

I have supplied both my colonies with the recommended amount of inverted syrup during October this year. And a look at my records for 2017 showed me that I did not feed my bees with sugar fondant until the last week of December. But this year has been different and I have stronger colonies than I had last year. (The above colony is a ‘brood and a half’ and my other colony comprises 2 brood chambers with a reduced number of frames in each). So I was tempted to provide them with some sugar fondant a month earlier than I had done last year.

IMG_8082

My overall plan is to apply a trickle treatment (oxalic acid/sugar syrup mix) during the last week of December as part of a treatment plan to reduce varroa mite. And immediately after applying the trickle treatment I will place a slab of fondant directly over the top of the brood frames – this should hopefully last them through to March/April. But in the meantime I have given each colony approximately 870 grams of fondant. This was placed in an upturned plastic container on 18th November and placed directly over the escape hole in the polycarbonate quilt. The above photo, taken on 25th November, shows that the bees in this colony have already consumed about 1/3 of the fondant in a week! I asked the question, last year, “if fondant is supplied – will the bees feed off their honey stores before going for the fondant?” The answer I received was non-committal and only that “feeding the bees with fondant is similar to an insurance policy”. Well, from my limited experience of last year, and now this, it appears to me that the bees go for the fondant as soon as it is given to them irrespective of whether they have honey stores of their own or not. (Which makes me second guess if it is prudent to supply the fondant as early as I have or not!). At this rate I will need to give them more fondant soon and certainly before the end of December.

fullsizeoutput_2ff7

A section of Celotex insulation board – cut out to accommodate the tub of fondant.

fullsizeoutput_2ffb

And another layer of insulation (20mm thick recycled chip foam) placed on top.

With all the insulation required in the winter for a wooden hive it makes me wonder whether it may be a good idea or not to add some poly hives, in addition to the wooden hives, to the apiary when I increase the number of colonies.

End of Summer & Into Autumn

fullsizeoutput_2d10

Now that I am a few months into my 2nd year of beekeeping I can reflect that I have had varied success with my efforts. Having started off with a 6-frame NUC of bees, I now have 2 large colonies. The month of May was particularly frantic when I experienced, for the first time, a colony intent on swarming. Thankfully the colony did not swarm but it had to be split twice to prevent it from swarming. Initially I used the ‘Artificial swarm’ method but this was soon followed up by the ‘Nucleus method’. The ‘artificial swarm’ did not  result in a newly mated queen and I eventually had to reunite it. But from the ‘Nucleus method’ I was able to increase, gain a newly mated queen and a second colony. And as the season continued my original colony, with a 3-year old queen, tried to supersede – but failed.

I also had to add supers (and then eventually remove them). Timing is all important. It was explained to me that adding room for the bees to expand can be equated with pot plants – plants can become root-bound if not ‘potted-up’ but if you put them in a bigger pot too early they are overwhelmed and do not flourish properly. Notwithstanding the time taken up with swarm control, my bees provided me with nearly 4 full supers of honey.  The task of extracting and jarring the honey became easier each time it was done. The first time I extracted the honey it would only go through the course and the fine sieve but not the very fine cloth. This is OK if the honey is for friends/ personal use. But if selling honey, or if you wish to exhibit honey then you also need to use a straining cloth.

fullsizeoutput_2d18

‘Scottish Beekeepers’ and ‘East of Scotland Beekeepers’ exhibit their honey at the annual Dundee Flower and Food Festival. I had decided to exhibit some honey simply to gain the experience of doing it. I submitted three entries; two for clear honey and one for granulated honey. To my surprise the granulated honey received first prize and one of the clear honey entries received third prize. I was also awarded a trophy (Honey Novice). It’s a funny old world.

It is essential to have a good plan in place prior to making any inspection of your bees. And there were one or two occasions during the year when I agonized over what to do in order for the best. My most recent dilemma came when  the colony with the 2018 queen refused to dwindle in size despite the weather conditions and lack of forage. I was wanting to remove the last super so that I could start varroa control and also start feeding the bees up for the winter. I am using APIVAR strips and wanted to apply them in the brood box at the beginning of September so that I can remove them in the middle of October. (Delaying is not a good idea due to potential weather conditions in late October). But the brood box was full of bees and the super likewise. After discussing this issue with several beekeepers (some ideas they offered even I didn’t like) I eventually elected to go to a brood and a half. Many beekeepers will do everything they can to avoid this but for me this seemed to be the best option for my particular situation.

fullsizeoutput_2cf5

APIVAR strips applied in the brood box

The wasp traps have been removed from the apiary now and I am starting to feed the bees to prepare them for the winter. Winter-strength sugar syrup should be given to the bees but inverted syrup is also an option. Using inverted syrup is beneficial because the bees have less work to do as they consume the syrup but the main reason is that inverted syrup does not ferment.  You should stop feeding sugar syrup to the bees during early October but you can continue feeding them with inverted syrup for longer if there is the need. I didn’t use inverted syrup last year and my bees stopped consuming the syrup, of their own accord, by the end of September.

fullsizeoutput_2cf7

Filling the rapid feeder with sugar syrup

During the winter of 2017/2018 my one and only colony managed to survive in a single brood box consisting of eleven frames. This coming winter I am going to try a brood and a half (a super below a brood box) for one colony and for the other colony a double brood box with a reduced number of frames in each (eight frames in each). The double brood box approach is one that was always recommended by the late Ian Craig – a successful and respected beekeeper in Scotland.

One thing I am learning is that there are many ways to keep bees and many beekeepers will do what works for them. So long as I do not make any fundamental mistakes I will be happy. But if I do make some mistakes along the way then I hope to learn from them. There are some milestones to pass, particularly in April when I hope to be in a position to mark the 2018 queen. There is equipment to clean up now and lots of reading to do.  Queen rearing will be high on the agenda. The APIVAR strips will be removed mid-October and around that time mouse guards may be fitted to the hives. The hives will need to be strapped down and fondant may be applied in December. But I am getting ahead of myself 🙂


Supersedure Cell?

IMG_6886

I split one of my colonies today (1st August 2018).

The colony housing a 2015 Queen and comprising 2 brood boxes   and 1 super has now been split (with the queen free to lay in both boxes). Why did I make the split? Because I found 1 queen cell, not quite capped and containing a pearly white larvae inside it. There was only 1 queen cell but it was at the bottom bar of 1 frame. All the books indicate that swarm cells are generally found at or near the bottom bar of the frame and there can be several of them; an emergency cell can be found almost anywhere; and supersedure cells will normally be less than 5 in number and all in the middle/centre of the same frame. But all experienced beekeepers keep telling me that often the bees just don’t read the books! And in this case, given the time of year and the ample space available to the bees, and the space available for the queen to lay, and the good amount of stores available for the colony it seems unlikely that they would want to swarm. It’s more likely that the queen may have past her prime and may not be communicating pheromones that are acceptable to the worker bees. It is therefore more likely that the bees have decided to replace the queen themselves i.e. supersede.

To split the colony I needed to find the queen. I had tried to find her 4 days ago and couldn’t. But I did today. Most of her ‘blue’ mark has rubbed away from her thorax. I removed the super and put it to one side, then I removed the top brood box and placed it onto an upturned roof  and placed a cloth over it to keep those bees in the dark. I was then free to check the bottom brood box, frame by frame. I did that by separating the frames into pairs thus creating areas of light and dark in an effort to try and control the movement of the queen (queens try to move away from the light). The queen was not found in the bottom brood box. I put a queen excluder on top of the bottom brood box and put the top brood box back on it. (This meant that if the queen was in the top brood box i.e. if I had not overlooked her in the bottom brood box) she would not be able to move back into the bottom brood box while I was checking the top).

I found the queen in the top brood box and when I found her I moved the frame she occupied into a nuc box for safe keeping until I was organised. My plan was to separate the brood boxes and, on completion, have the old queen at a new location (with no queen cells) and keep the other brood box containing the ‘supercedure’ queen cell in the original location. I also kept the super at the original location above the brood box containing the ‘supercedure’ queen cell. Why? Because the bees in the super can fly. And all the ‘flying bees’ will want to fly back to the original location. Therefore the hive at the original location needs sufficient space to accommodate all the bees. (Whereas the hive at the new location will only consist of the old queen, brood, honey stores and pollen – flying bees return to the hive at the original location – and only the bees that have yet to hatch from the brood at the new location will consider the new location to be their place of residence).

Because the bees at the new location are not yet able to fly and bring forage back to the hive I needed to supply them with extra ‘food’ – to make sure all their honey stores are not consumed and then the bees are not left to starve. I placed a quilt over the brood box then a super to house a contact feeder containing sugar syrup. In an effort to prevent ‘robbers’ (there are temporarily no ‘guard’ bees at the new location) I temporarily reduced the entrance to 1 or 2 bee spaces by placing some loose grass at the entrance. I have also placed a hornet trap and a couple of wasp traps close by to attract and trap potential robbers.

Why did I make the split? I could have left the bees to supersede naturally i.e. just let the bees get on with it – without any intervention from me. But the new ‘supercedure’ cell first has to hatch. Then the emerging virgin queen has to mate. And then I need to observe her laying. At every stage there is a potential for something to go wrong .e.g. she may not mate etc. So, at least by removing the queen from the original colony I am making sure that if the new queen fails I will not have lost a queenright colony.

I calculate that the virgin queen should emerge on the 4th or 5th August. I will then need to wait for at least 2 weeks before I check again to see if I have a new queen that is laying. If I have a positive result I will unite the bees from the hive that is now housing the 2015 queen (after removing the 2015 queen). Time is marching on. Ideally I would like this process to take place in sufficient time to be able to treat for varroa by the beginning of September. (adding 2 APIVAR strips to each colony).

I extracted 23lbs of honey on 9th June. I will be removing another super from colony #2 tomorrow. Hopefully this will produce a similar amount of the golden stuff.


DNA Testing

005 10 01 02

Photos of my bees were submitted to the Scottish Native Honey Bee Society as part of a conservation project, and as a result my bees were selected to have their DNA tested.

http://www.snhbs.scot/scottish-native-honey-bee-conservation-project/

A sample of 30 to 40 bees were taken yesterday and posted off for DNA testing. In the coming week some grafting will take place, from colony #1, to continue the line of the queen in the colony from which the sample was taken.

Reuniting was successful

I checked the progress of colony #1 yesterday and the 2015 queen has been accepted into this colony. I have, for now, retained a double brood box system but there are a reduced number of frames in each box i.e. 9 frames in each instead of the normal number of 11 frames in each for a BS National hive. When the number of bees naturally reduce towards the autumn I may then reduce the hive to a single brood box for the winter. The 2015 queen is more than likely past her peak and may be failing even though she is continuing to lay. (By comparison the 2018 queen in colony #2 is a prolific layer). So I will need to monitor for signs of supercedure in colony #1).

Varroa Tester

A sample of about 200 bees were checked for varroa yesterday (from colony #1) using a ‘varroa tester’. The bees were temporarily anesthetized with CO2 (including any varroa mite that may have been present). These bees were then shaken within the container to see if varroa mite would drop off them. For this particular test no varroa mite was evident. The bees were then placed back into the hive. This test is, allegedly, an improved way of checking for varroa mite versus the method of monitoring  for varroa mite when using an open mesh floor.

Phacelia

A crop of phacelia is now starting to come into flower further afield. And I have been helping another beekeeper move some of his hives to it. This crop should last for about 6 weeks.

Continuing to collect swarms

Last weekend I helped to collect another swarm that had settled atop a field post. It was a large prime swarm.

A skep was upturned and positioned above the swarm and then the bees were smoked up into the skep from below. This took some time and a little gentle persuasion using a bee brush also came into play.

Forage

The June-Gap may soon be over. I am hopeful that soon there will be plenty of clover for the bees to gorge on. 🙂

Collecting Swarms

In the past three days I have been called out to collect a couple of swarms. The first call was on Saturday and the result was succesful. The swarm of honeybees were hanging on the branch of a tree which was about 5 feet off the ground. A white sheet was placed on the ground below the swarm. A skep with some  lemongrass oil splashed inside it was positioned underneath the branch/cluster. The weather conditions weren’t ideal, with light rain, but at least the bees didn’t have to be sprayed with water! The branch was given a good whack and the bees dropped into the skep. The skep was turned upside down and placed on a small sheet of plywood and onto the white sheet. The skep was then propped up a little on one side, using a small piece of wood, which would allow the bees that had landed on the sheet to make their way into the skep. Eventually the bees at the entrance to the skep gave a ‘fanning action’ to signal the other bees to join them in the skep. Then the skep with plywood was moved to a hive that contained frames of drawn comb in it’s brood box and the bees were shaken into it. The entrance to the hive was temporarily blocked to prevent the queen from trying to leave again. These bees will be fed over the next few days and then treated for varroa.

My second call was to a compost bin in someone’s garden. The bees had made a temporary home at the base of a compost bin and had obvioulsy been there long enough to draw out some comb. But sadly, when I arrived, I found all the bees to be dead. The bees had been starved. When collecting a swarm you may well be doing someone a favour. But you never know what you are going to get. Are the bees heavily diseased? Is there a queen and if so how old is she etc. And of course you will need somewhere to put them – preferably at a ‘quarantined’ site so that they can be managed properly and fully assessed without them causing any complications to other colonies in your apiary.

The ‘June Gap’


IMG_6279

9th June 2018

Despite a slow start to the Spring the weather has been very good over recent weeks. However the early cherry blossom has long gone, and the Oil Seed Rape (OSR) crops in the area are finshed. Hawthorn and cotoneaster are still available for the bees to forage but the early ‘flow’ is over and the ‘June Gap’ is all but here.

Apiary maintenance was required to maintain a working area behind the hives and to ensure a clear flight path to the hives.

Four days ago the top super of #1 hive was full so I applied a clearing board and waited a couple of days to clear the bees from it. I then removed the super for extraction. It is better to extract this honey if it has, as part of it’s source, OSR because OSR results in a particularly granulated honey that can be difficult to extract if left for too long. It is important to remember that when removing a super the hive must have space for the bees to go into after being cleared from the super. In this particular case I had inserted another super underneath it and the bees were starting to draw comb from it’s foundation.

fullsizeoutput_1ddd

The cappings are first removed from the honey with a sharp, and hot, knife. I used a tangential extractor which uses centrifugal force to extract the honey from the combs on the frames.

IMG_6238

I was warned that it can be a sticky business extracting honey but with some care and organisation it is manageable. (We had made provision for our dog to be looked after. We were using our kitchen as the processing room and to maintain the necessary hygiene standards and keep disruption to the minimum we needed to be dog-free for a couple of hours!).

IMG_6244

This honey was filtered straight away using a course and fine sieve in tandem. I am told that beekeepers often prefer to store unfiltered honey in buckets and then when they are ready to bottle it they will warm it and filter the honey at that stage. The honey will flow through the sieves more easily. I will probably try that in the future but this is my first batch of honey so everything is a learning process. I let the filtered honey settle for a day in a bucket before putting it into jars.


I have also been assured that it is quite normal for the bees to deposit some pollen in frames within the super as well.  The next two photos show supers that have been extracted of their honey and pollen remains:

And now back to the important stuff – my bees!

Hive #1 should, by now, have a newly emerged queen that has been out on her mating flight. I will be making a check in 4 days from now to see if I can see signs to that effect. Fingers crossed.

Hive #2 is in a similar situation but could be about a week behind hive #1. And Hive #3 is in the process of being rebuilt back to strength. It presently has only 9 frames and contains the original queen.